Step 1: Access the Support Portal
- Open your browser and go to the Broadcom Support Portal:
Step 2: Log In
- Log in with your credentials. If you don’t have an account, you may need to register.


Step 3: Select the Appropriate Division
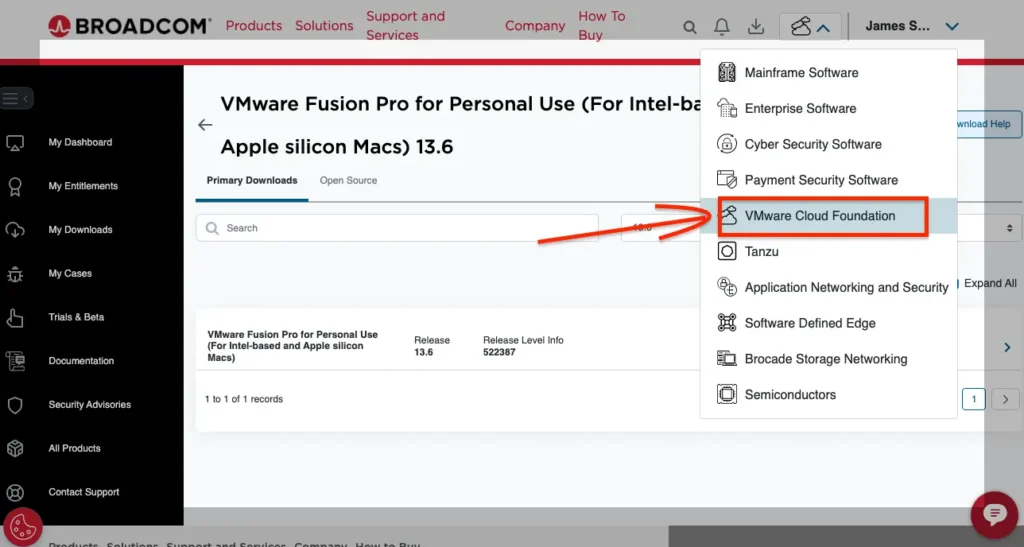
- Once logged in, navigate to the top right corner.
- Click on the division dropdown and select “VMware Cloud Foundation”.
Step 4: Go to Downloads Section
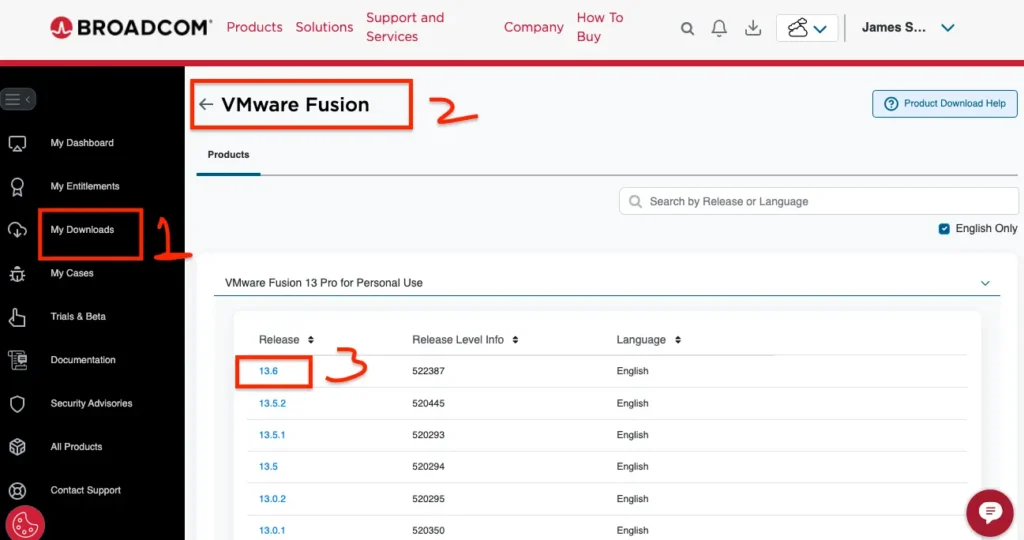
- In the dashboard, locate and click on “My Downloads” from the menu.
Step 5: Search for VMware Fusion
- In the downloads section, find the search bar.
- Type “VMware Fusion” and press Enter.


Step 6: Select VMware Fusion 13 for Mac
- In the search results, look for VMware Fusion 13.
- Click on the product to view the available downloads.


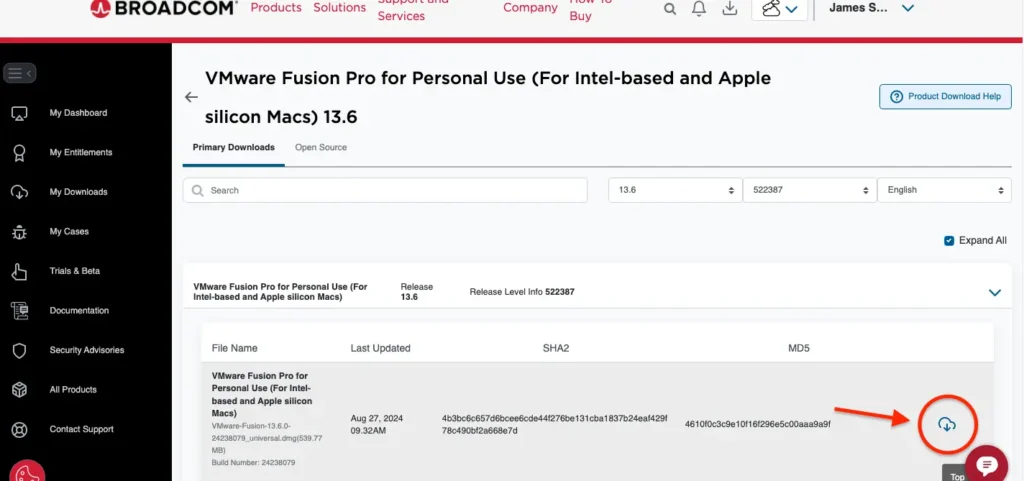
Step 7: Download VMware Fusion 13 for macOS
- Select the version compatible with macOS (usually a .dmg file).
- Click Download and wait for the process to finish.
Step 8: Install VMware Fusion 13
- Once downloaded, open the installer file and follow the on-screen instructions to install VMware Fusion 13 on your Mac.